Layers of Filling
With your raised beds built and ready, you’ve reached an exciting milestone! It’s time to fill your beds with the best soil to grow plants in.
When growing vegetables in a raised bed, it’s best to use a loose, aerated mix of nutritious soil to a depth of about 6-8 inches; and closer to 12 inches if you’re planning to grow root vegetables like carrots.
Material at Your Fingertips
If your raised beds are built even deeper than that, add filler to the bottom layers with material right at your fingertips like dead leaves, straw, mulch, wood chips, twigs, layers of newspaper, and cardboard boxes cut into strips; or a lovely mixture of all of them!

Layered newspaper at the very bottom of your raised bed offers the added benefit of suppressing weeds from the outset, and will decompose over time.
Don’t Waste That Grass!
If you built your raised beds over a grassy area, save any removed grass clumps and place them grass-face-down in the very bottom of your bed. Don’t worry about grass growing out of your raised bed. If you’ve buried the grass deeply enough beneath your planting soil, any seeds won’t receive enough light to grow. You’ll simply end up with a healthy compost as your base layer!
Planting Soil for Raised Beds
There are several routes to building up the best planting soil for your beds. Use a soil calculator to determine the volume of materials you’ll need to fill each raised bed. Remember, calculate only for the top layers at a depth of 6-8 inches, or closer to 12 inches for carrots and other root veggies.
Purchased Raised Bed Soil
🌳 Best Nurseries & Garden Centers In Asheville 🪴
You can purchase bags of pre-mixed potting soil or raised bed mix such as these popular choices:
- Black Gold Organic Raised Bed and Potting Mix
- Fox Farm Happy Frog Potting Soil
- Miracle Gro Raised Bed Soil
There are many great commercial sources for raised bed soil, but it’s wise to invest at the outset in a good brand. Ask your favorite local nursery which raised bed soil they recommend. I especially love Daddy Pete’s Raised Bed Soil Mix, which is produced locally in Stony Point, North Carolina.
Avoid using bagged topsoil which is typically composed of clay and sand, tends to be dry and gritty, and lacks organic matter, and thus, adequate nutrition.
Start your beds off well for productive gardening. It’s easier to keep your beds healthy and well-fed over time if you’ve started them off right!
DIY Raised Bed Soil
A less expensive way to arrive at high-quality raised bed soil is to DIY your mix! Combine 3 different ingredients to create the quality of soil you’d buy from a pre-mixed brand.
Raised Bed Soil DIY Mix: 3 Part Recipe
- 50% compost for nutrition
- 25% coco coir or peat moss for water retention
- 25% vermiculite for drainage and aeration
Compost (50%)
Compost is simply decayed organic matter; it’s where the most nutrition for your plants comes from. If you don’t generate your own compost yet, never fear! You can buy compost prepackaged in bags, or in bulk delivery from your local mulch yard. There are many choices such as the classic cow manure compost, mushroom compost, chicken poop compost, and vermicompost, or worm casting compost (otherwise known as worm poop).
It’s great to combine more than one type of compost for a wide nutritional balance. I recommend worm casting compost such as Wiggle Worm Worm Castings Organic Fertilizer to add a huge boost of nutrients to your raised beds. You can mix 2-3 bags of cow manure or mushroom compost to 1 bag of worm casting to cultivate a rich balance.
Coco Coir or Peat Moss (25%)
Peat moss is a decomposed moss that helps soil retain nutrients and water. It’s lightweight and spongy with the ability to hold air and moisture while allowing excess water to drain freely. It tends to be pest-free and it’s cheap.
Unfortunately, as peatlands take eons to form, peat moss isn’t a renewable resource. As an ecosystem, peatlands are considered to be as vital to the earth’s health as rainforests and old growth forests are. If you are concerned with the conservation of natural resources (and what gardener isn’t?) then coco coir is a perfect alternative to peat moss!
Coco Coir is the material harvested from coconuts between the shell and the outer coating of the coconut seed. Coconuts are routinely harvested as a food product, but up until recently the coconut husk was considered mere waste. Now we’ve come to realize this material has valuable applications in gardening and hydroponics!
Coco coir is one of the most effective growing media for water retention available, absorbing up to 10x its weight in water. It’s quite inhospitable to most insects, and repurposed from a renewable resource, so coco coir is an environmentally safe choice, unlike peat moss.
Remember that coco coir and peat moss contain almost no inherent nutrition, and need to used in combination with nutrient-rich compost to build up raised bed soil.
Vermiculite (25%)
Vermiculite is a useful ingredient for the drainage and aeration of your raised garden beds. Vermiculite is the name of a group of hydrated laminar minerals (aluminum-iron magnesium silicates) which look like mica. Vermiculite doesn’t rot, deteriorate, or mold and is odorless, non-toxic, and sterile.
Very few plants can tolerate their roots sitting in water (aka having “wet feet”) so it’s important for your soil to drain water at a good pace, not too quickly or too slowly. When mixed with compost and coco coir or peat moss, vermiculite provides the perfect amount of aeration and drainage for raised bed soil.
Combination Raised Bed Soil
When I first filled my raised beds to 8 inches depth, I used the DIY method of 50% compost (cow & mushroom compost with worm castings) with 25% coco coir and 25% vermiculite. I mixed my ingredients in big batches in a wheelbarrow and dumped it on top of my base layer.
At the base layer of my beds (which are pretty deep) I laid newspaper about 8-sheets thick and threw in a bunch of material to fill my bottom layers, a lovely mix of dead leaves, old straw, grass clippings, and kitchen waste to rot into homemade compost beneath my DIY soil mix.
My raised beds have been happy ever since!
Refreshing Your Raised Beds
Once you’ve had a harvest from your raised beds, you need to refresh the nutrients in the soil that helped your plants grow big and beautiful. When I refresh my beds, I don’t dig or turnover my soil as I don’t want to disturb healthy bacteria and mycorrhizal fungi living there.
Instead, I simply toss more compost on top to refresh the nutrients in my beds!
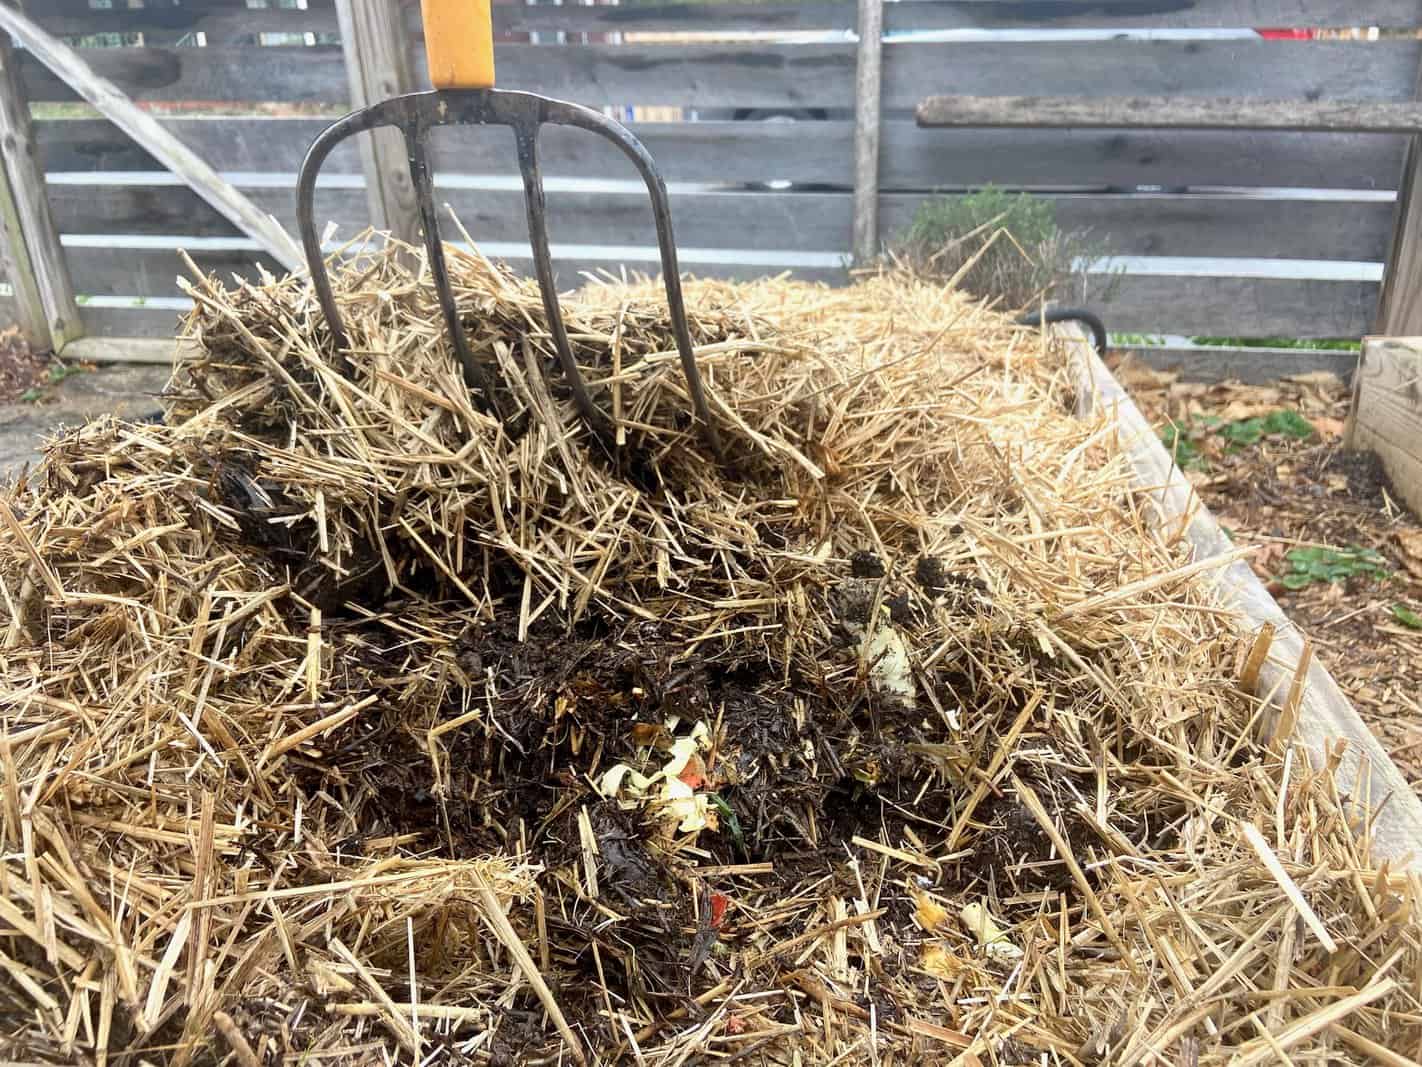
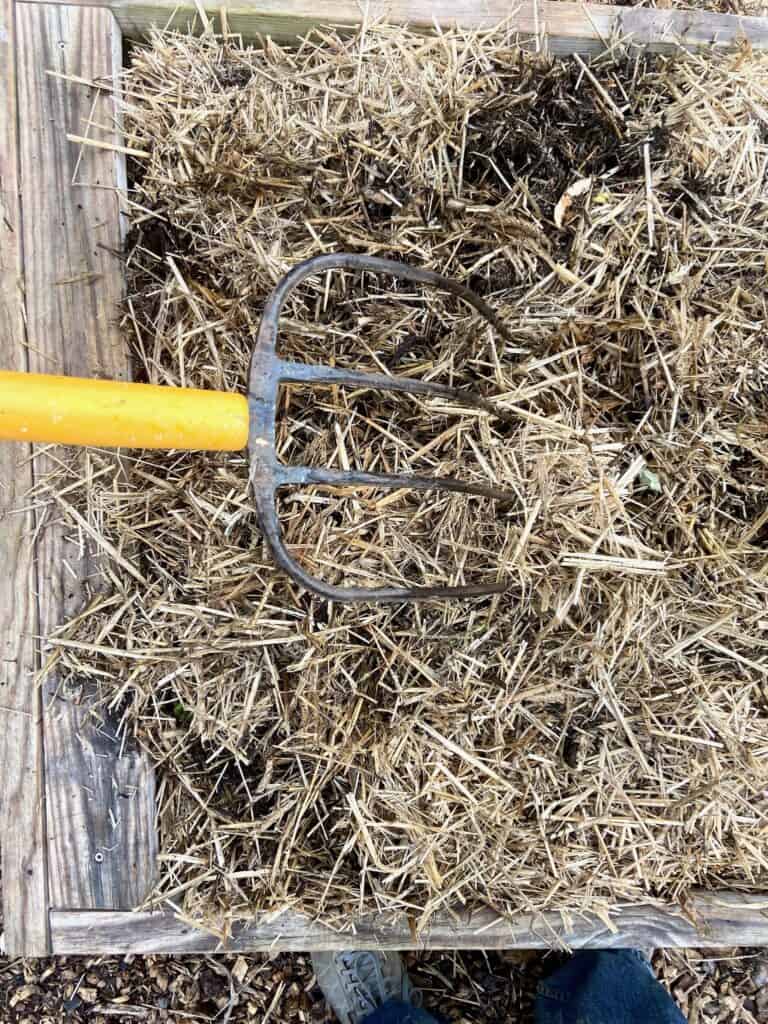
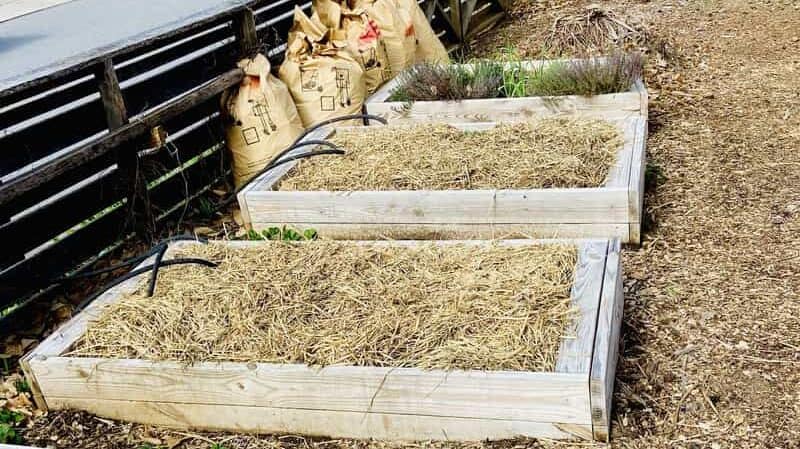
No Dig Method: Throw Straw On Top
This past winter I’m trying something new. Once I harvested my fall crops, I layered my raised beds with 4-5 inches of wet, moldy straw that was sitting about unused.
Every so often I take collected kitchen scraps (which I’d normally just toss on a compost pile) and shove them beneath the straw layer on a raised bed by using a pitchfork to move aside a patch of straw and then put it back – reverse side up.
The idea is the straw slowly decomposes along with the kitchen scraps all winter long, feeding my soil with nutrients. In late spring when I’m ready to plant, I’ll leave the straw and plant within it as a weed-suppressing mulch around my seedlings.
I’ll report back when I see how this method of cultivating and invigorating raised bed soil works for me. I hope this article was useful to you. Happy Gardening to all!